Using RoverWing Top
RoverWing top is an optional accessory to RoverWing, which includes a small prototyping area, on/off switch, three NeoPixel LEDs and two buttons, and a 3-line display. It is described in detail in RoverWing User Guide. A photo of the RoverWing with the top attached is shown below.
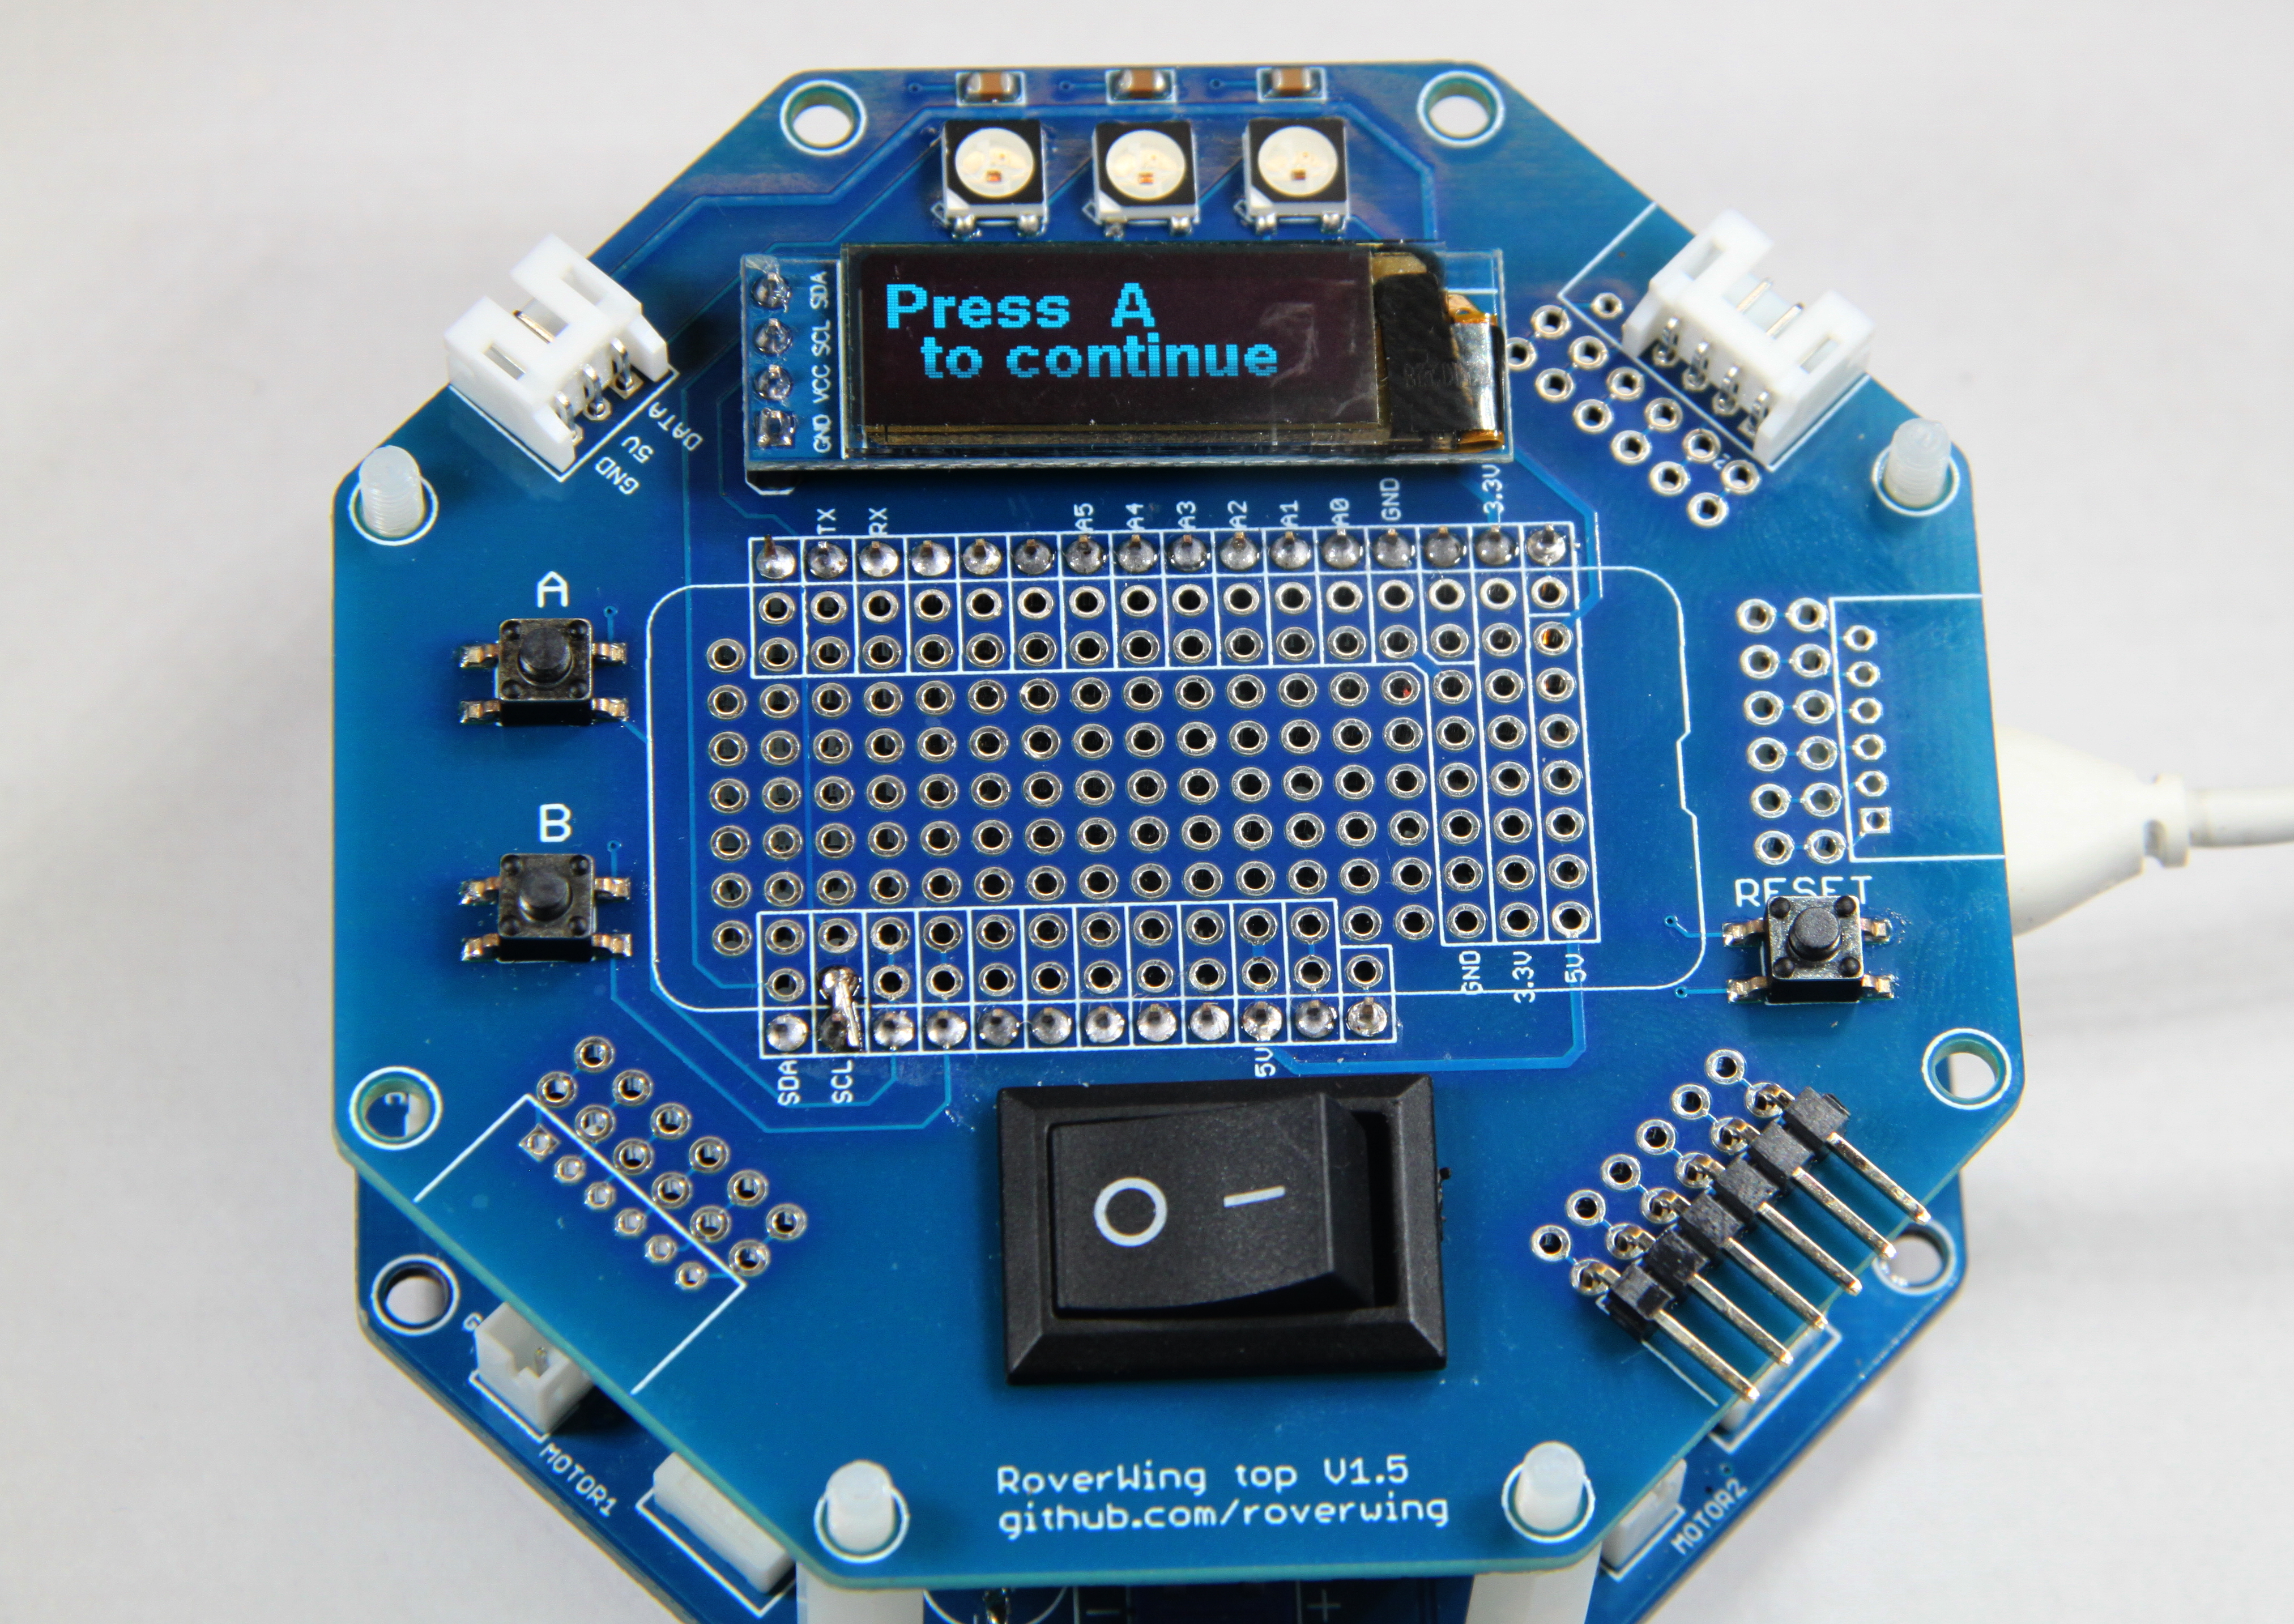
RoverWing board with the top attached.
RoverWing library includes some functions for use with the RoverWing top. To use these functions, you need to have the graphics library U8G2 installed; you can do it easily by using Arduino IDE library manager.
RoverWing library includes a sample sketch illustrating the use of RoverWing top; this sketch can be found under .
Initialization
The sample code below shows basic initialization necessary to use RoverWing top:
#include <Wire.h>
#include <RoverWing.h>
#include <RoverWingTop.h> //library for use with the top display and buttons
#define BUTTON_A 5
#define BUTTON_B 6

Rover r; //this is the name of the rover!
void setup(){
    pinMode(BUTTON_A, INPUT_PULLUP);
    pinMode(BUTTON_B, INPUT_PULLUP);
    Wire.begin();
    Wire.setClock(400000); //use fast mode (400 kHz)
    // declare the NeoPixels
    r.setPixelCount(3);
    //initialize the top display
    topDisplay.begin();
    topDisplay.clearBuffer();
    //connect to RoverWing
    r.beginVerbose();
}
Note that there is no need to include U8G2 library, as it is included by
RoverWing.h.
Buttons
RoverWing top contains two buttons, labelled Button A and Button B. These buttons are connected to two pins of the Feather board: button A is connected to the pin next to SCL, and button B, to the next pin. Unfortunately, pin numbers assigned to this pins depend on which Feather board you are using; for this reason, you need to include the definitions in your sketch, as illustrated above.
For Feather boards based on Cortex M0, Atmega 328P, or 32u4 chipsets, the pin numbers are 5 (button A) and 6 (button B). For HUZZAH32-ESP32 Feather, these are pin numbers 14 (button A) and 32 (button B).
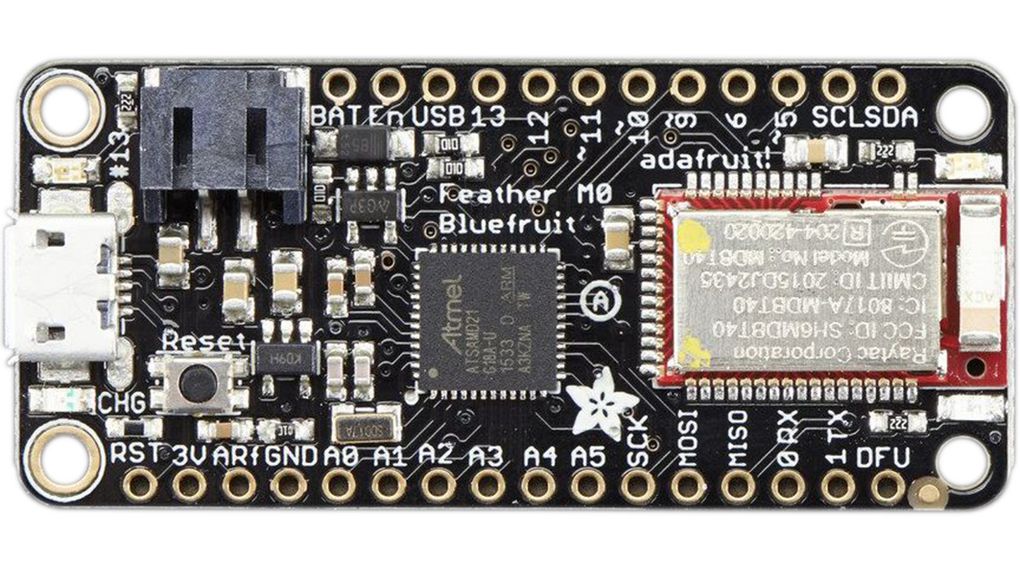
Adafruit Bluefruit Feather, based on M0 chip, top view. Buttons A and B of RoverWing top are connected to pins 5 and 6 respectively.
Note
Instead of BUTTON_A and BUTTON_B, you can define your own names for
buttons.
Pins connected to buttons should be configured as INPUT_PULLUP; this way,
they will normally be HIGH, and pressing the button pulls it LOW.
You can read the pin values in the usual way, using digitalRead(BUTTON_A);
in addition, you can also use the waitForButton() function below.
-
void
waitForButton(uint8_t button)
-
bool
waitForButton(uint8_t button, int timeout) Pauses execution of the program until the button is pressed.
Parameters: - button (uint8_t) – button to be pressed. Can be a pin number or a
defined constant such as
BUTTON_A. - timeout (int) – timeout in milliseconds (optional). If this parameter
is given, the function will wait until either the button is pressed
(in which case it returns
true) or given number of milliseconds passes (in which case it returnsfalse). If no timeout parameter is given, the function doesn’t return any value.
- button (uint8_t) – button to be pressed. Can be a pin number or a
defined constant such as
Note that waitForButton() function is global - it doesn’t do not belong to
any class.
LEDs
RoverWing top contains three NeoPixel LEDs, which are connected to the NeoPixel output port of RoverWing and can be controlled using functions described in NeoPixel section. These LEDs have indices 1 through 3 (right to left). For example, to turn the middle LED red and the two outer green, you can use
r.setPixelBrightness(64); //1/4 of full brightness - this is already quite bright
r.setPixelColor(1,GREEN);
r.setPixelColor(2,RED);
r.setPixelColor(3,GREEN);
r.showPixel();
Alternatively, you can use function setTopLED() described below.
-
void
setTopLED(uint32_t color)
-
void
setTopLED(uint32_t color1, uint32_t color2, uint32_t color3) Sets the colors of the Top NeoPixel LEDs. Each argument must be a color in the usual hexadecimal notation:
c=0xRRGGBB(see, e.g., https://www.w3schools.com/colors/colors_hexadecimal.asp). You can also use one of the named values for color:RED,GREEN,BLUE,WHITE,YELLOW,OFF. If only one argument is given, the same color is applied to all three NeoPixels. This function takes effect immediately: you do not need to callshowPixel().
Note that setTopLED() function belongs to class Rover, so it should be
called as r.setTopLED(), where r is the name of your rover.
RoverWing top also contains additional NeoPixel port, allowing one to connect
additional NeoPixel strips. In this case, the indices of externally connected
NeoPixels will start with 4, and the number of NeoPixels which you set using
setPixelCount() must include the three NeoPixels of the RoverWing Top and
the externally connected NeoPixels.
Warning
If you use RoverWing top, do not connect NeoPixels to the NeoPixel port of the RoverWing board itself — instead, use the port on the top.
Graphic Display
RoverWing contains a small (0.91 inch) monochrome OLED graphic display based
on SSD1306 chipset. This display has 128*32 resolution - enough for up to 3
lines of text (you could try and put 4 lines, but it would be barely readable).
It is connected directly to the SDA and SCL pins of Feather board and you can
use a library of your choice to control it. RoverWing expects that you have
installed U8G2 library and creates an
object topDisplay of class U8G2_SSD1306_128X32_UNIVISION_F_HW_I2C.
You can use any functions defined by U8G2 graphics library (see
U8G2 User Guide). In particular,
the following functions are most useful.
-
topDisplay.begin()¶ Initializes the display.
-
topDisplay.clearBuffer()¶ Clears the display, erasing all contents.
In addition, the following functions are defined in RoverWing.h. Note
that these functions are global - they do not belong to any class.
-
void
displayMessage(String line1)
-
void
displayMessage(String line1, String line2)
-
void
displayMessage(String line1, String line2, String line3) Output one, two, or three lines on the top display. This function uses the same font for 1- and 2- line messages, and a different, slightly smaller, font for 3-line messages. Note that the arguments should be of type
String, so if you need to output a number, you should turn it into a string first, e.g.displayMessage("Current time", String(millis()));
You can change the fonts used for messages by adding in the beginning of your sketch the following lines:
#define TWO_LINE_FONT u8g2_font_helvB14_tr
#define THREE_LINE_FONT u8g2_font_7x13B_tr
replacing the font names by a font of your choice from the list of fonts
included with U8G2 library; full list can be found
here.
Warning
The font definitions must appear in your sketch before the line
#include <RoverWingTop.h>.